
Girai Kaku


TL;DR: Creating a Kubernetes cluster with Raspberry Pis is just a bad idea, at least in early 2018. You can do very limited experiment with this cluster. You may see services you deployed crash because of
ARMv7compatibility problem, your Raspberry Pi runs out of memory because officially a machine with at least 2GB memory is suggested, or kernel oops occur but you don’t know why – it happened on my cluster when I use Weave Net as a CNI Network Provider. I am not saying ARM architecture is bad and I personally even has a preference for the ARM – Cortex-M core that Raspberry Pi used is not vulnerable to Meltdown! ARM is just not ready. If a physical Kubernetes cluster is what you want, my suggestion is that you should tryx86_64based single-board computer like Up Board or Minnowboard instead of Raspberry Pi.
You heard the word dockerization very often those days. Container technologies have been shaping the way enterprises building the cloud infrastructure for years. Although the most widely known container runtime now is Docker, there are still many other choices (rkt, CRI-O, gVisor) if you are looking for a specific runtime for a particular reason. When you look at the Cloud Native landscape, you will see Kubernetes has been the de facto standard for container orchestration. All three primary cloud providers (GCP, AWS, Azure) now have Kubernetes services support. In this blog post, not only will I share you how I built a Kubernetes Cluster with Raspberry Pis, but also more importantly, what learning resources you should use and what you should not because I believe:
There are tons of resources on the internet. Telling people what resources they don’t need to use is more important.
By no means, I’ve already deeply understood the container orchestration, but I hope my experience may also help you learn the basic of Kubernetes.
If you have tried to write a Dockerfile before, you should be aware of how container freed developers from worrying about what the underlying operating system is. But when developers hand containerized applications to operators, how operators manage those containers? The answer is Kubernetes. Forget the official tutorial and take your time, watch this awesome video made by Deis first. A PDF version is also available.
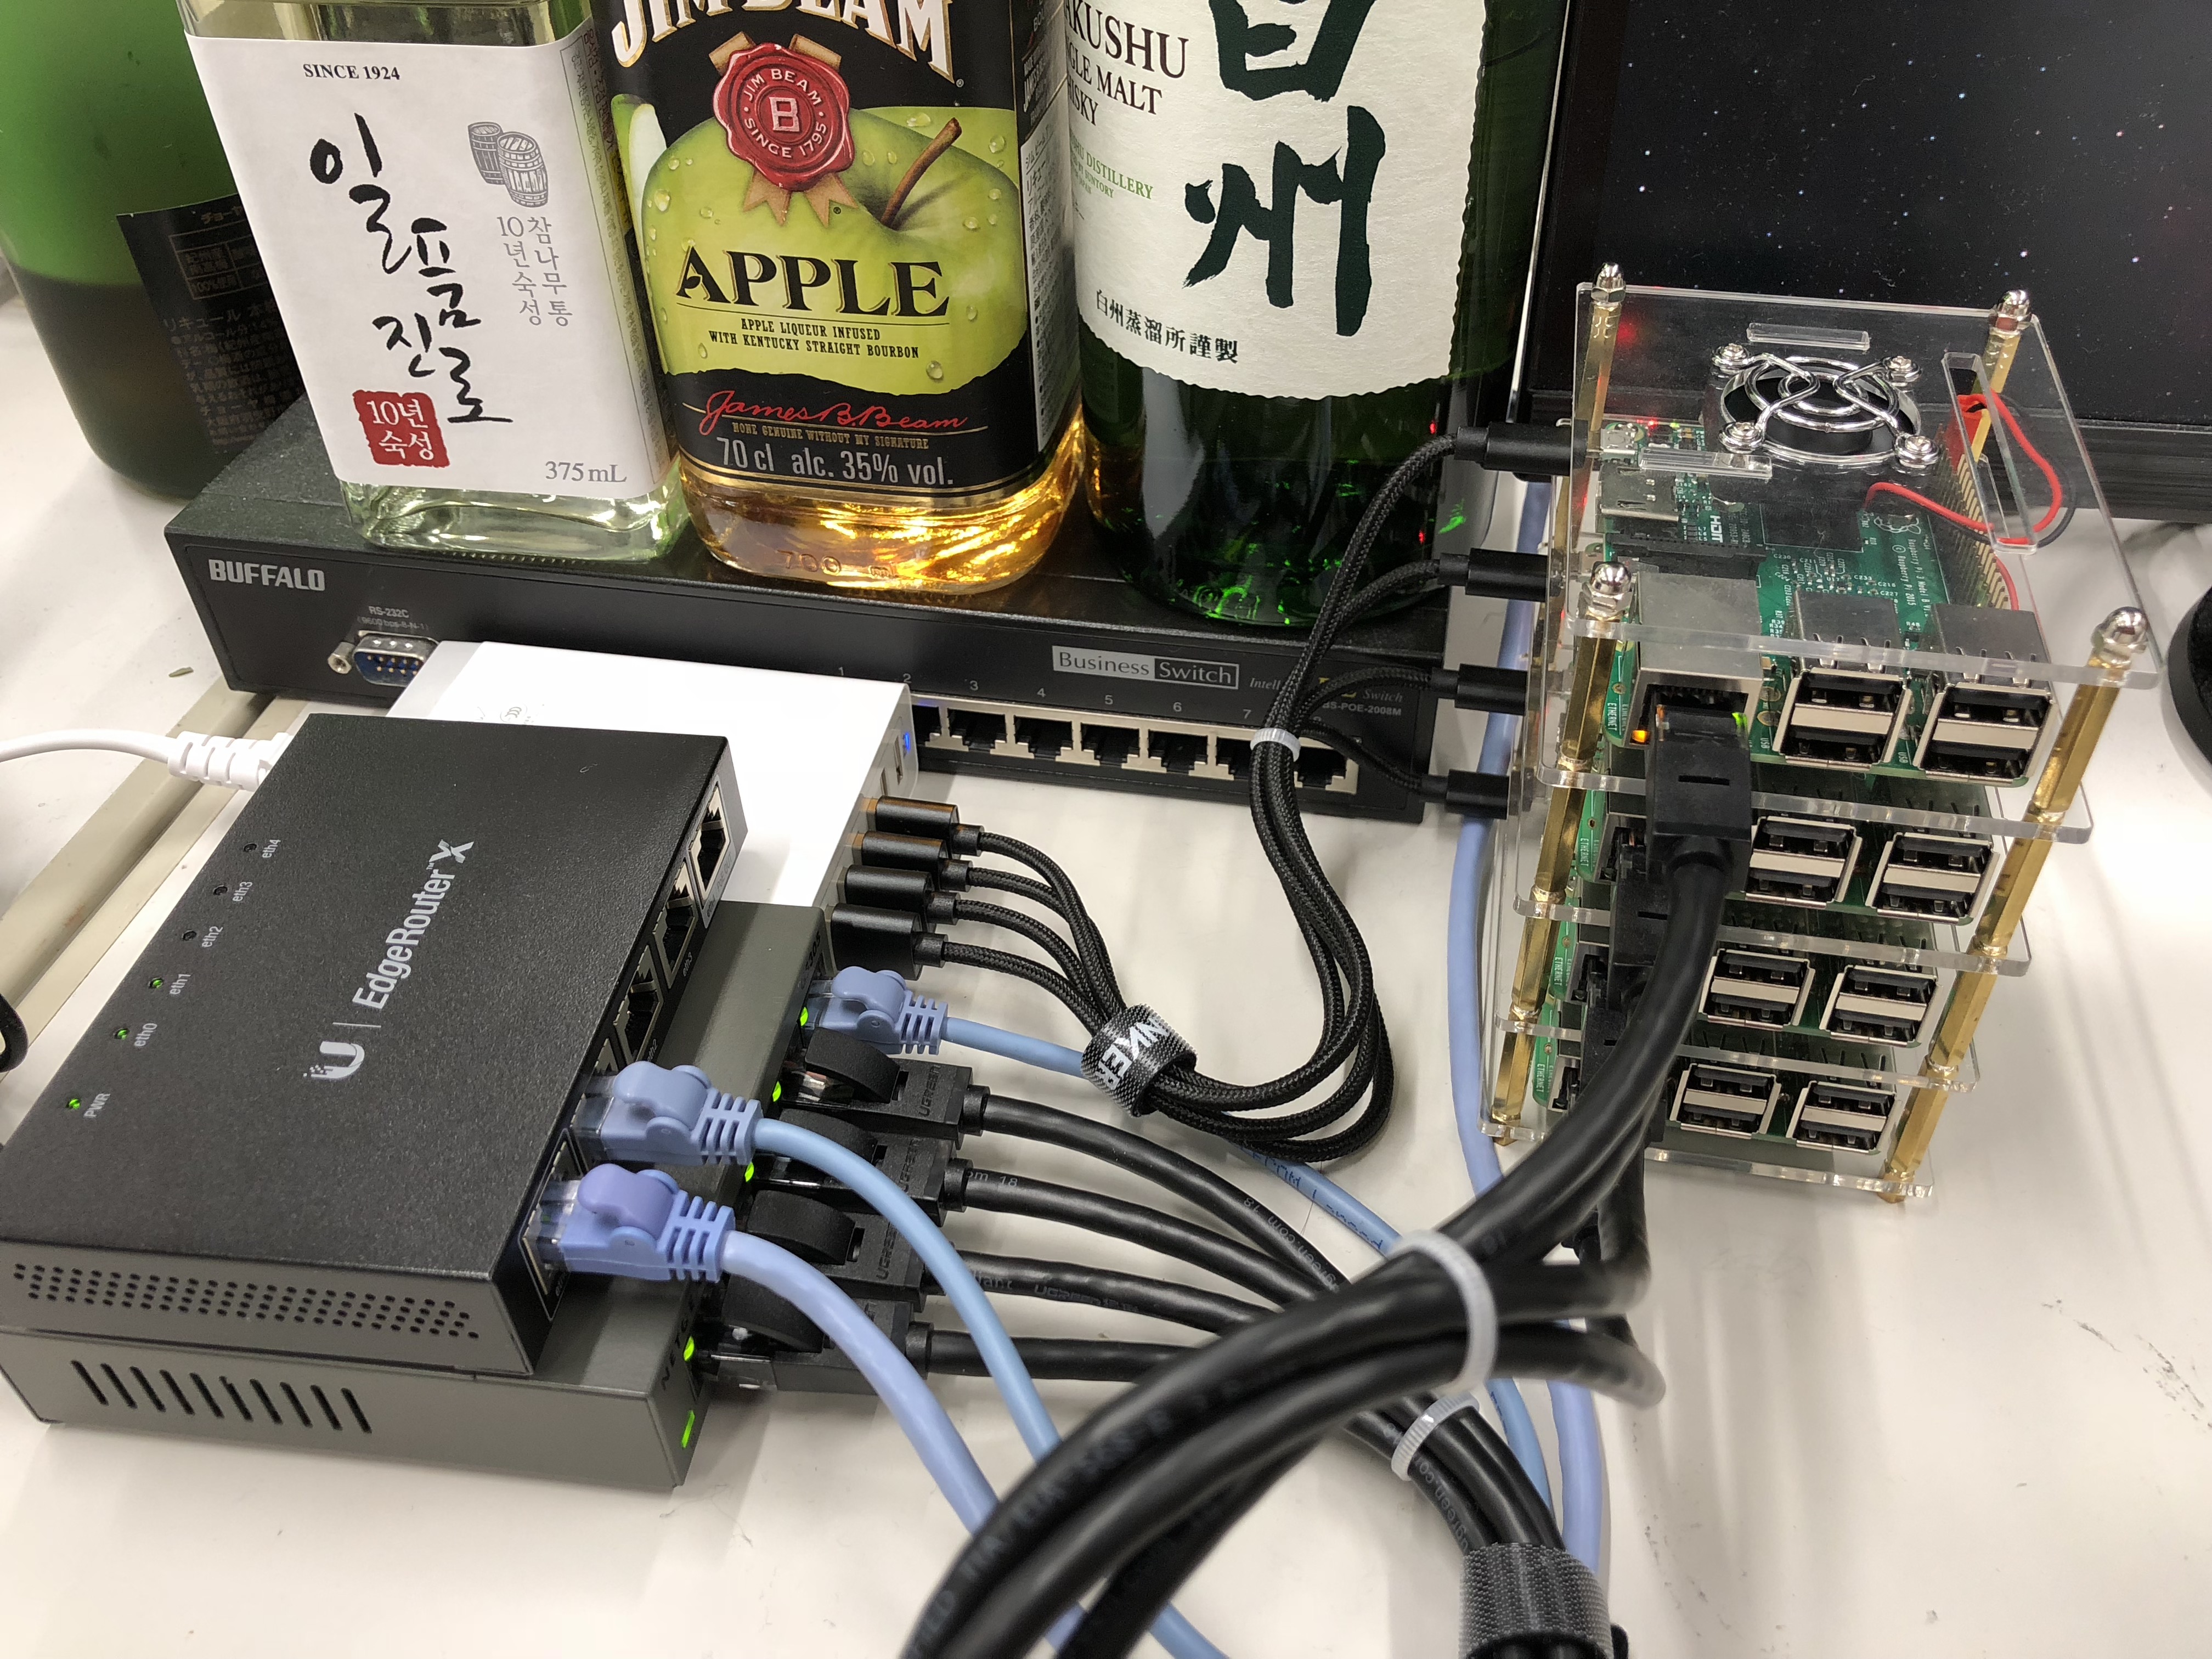
Let’s talk about the Kubernetes cluster on Raspberry Pi. So after I finished the online tutorials on Katacoda, I found Kelsey Hightower’s tutorial Kubernetes the Hard Way on Github. However, I was daunted when I saw the estimated cost to run that tutorial. It’s around $0.22 per hour or $5.39 per day. After doing some math, I found building a Kubernetes cluster with Raspberry Pis is cheap comparing to GCP. So I ordered those things.
That’s less than $400 in total, same price as running a 3-nodes cluster on Google Kubernetes Engine for two months.
The first choice I have to make is the operating system. Raspbian Lite, the official supported operating system is NOT the only option. For example, Hypriot, a Debian based OS, is also a feasible choice for building a Kubernetes cluster because it’s designed to make container a first-class citizen. If the Raspberry Pis you have are 3 or above, you can even try a 64-bit system (Ubuntu arm64 or Fedora 28). Eventually, I chose the most well-documented Raspbian Lite.
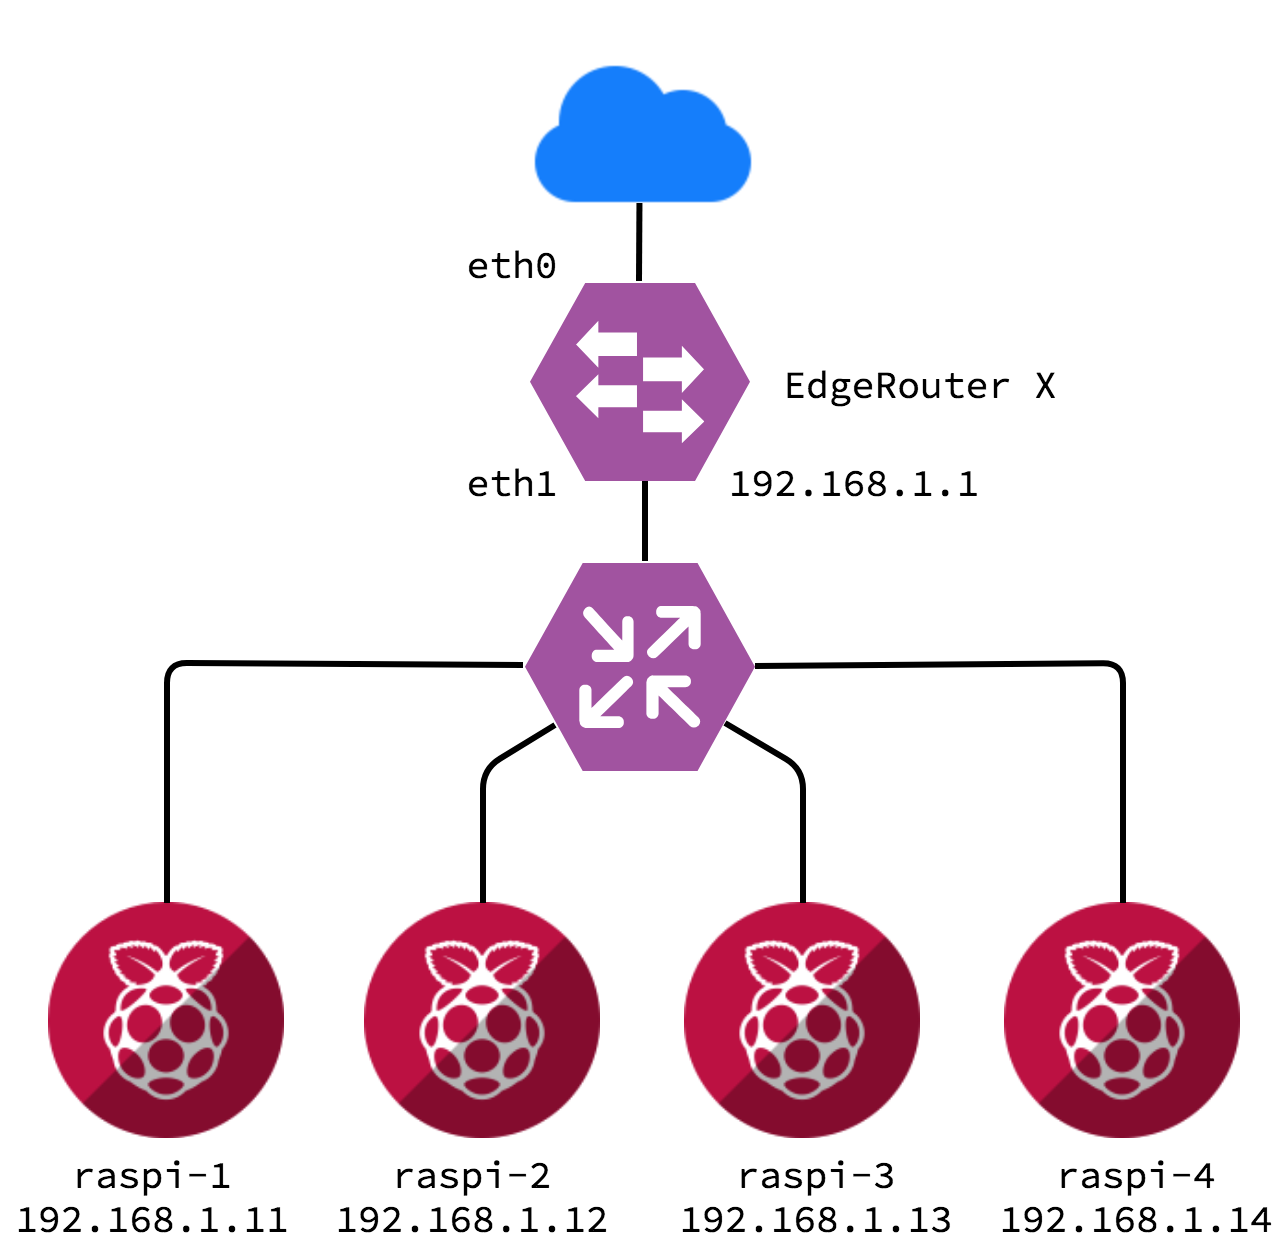
Use Etcher to burn Raspbian Lite into the microSD card. Run raspi-config to change the hostname and memory split. Allocate a static IP /etc/dhcpcd.conf for each Pi. Setting up the operating system for each Raspberry Pi is just tiresome. I don’t want to recreate a wheel. For more details, please follow Alex Ellis’s guide and come back before installing Docker. The topology is quite simple.
Before moving to the next step. You may want to use Ansible to automate the cluster setup. Thanks for Chris Short’s great project rak8s, all you need to do is to run ansible-playbook cluster.yml then. But wait, remember we say Kubernetes the hard way? rak8s is an awesome project but DO NOT use it bring up the Kubernetes cluster. It’s very likely you will see lots of errors (because I saw when I run it). Kubernetes is changing very fast. Hardly can contributors keep that playbook up-to-date. Let alone we are talking about Kubernete’s on ARM. I am not saying you should use zero automation. Instead, you should use one-liner in Ansible to run a command on all Raspberry Pis. For example, you can create an inventory file.
raspi-1    ansible_host=192.168.1.11
raspi-2    ansible_host=192.168.1.12
raspi-3    ansible_host=192.168.1.13
raspi-4    ansible_host=192.168.1.14

[master]
raspi-1
Then, use Ansible to run apt-get update on all nodes by executing the following command.
ansible -i inventory all -u pi -b -m shell -a "apt-get update"
If you have known Ansible already, you can read the source code of rak8s. The chances are that you are not very familiar with Ansible yet, so let go back to Alex Ellis’s guide.
Our next step is to install Docker CE. Although Docker is not the only runtime you can choose as I said before, but Docker officially supports Raspberry Pi now. You may see the convenience script but please don’t use it – our philosophy is learn Kubernetes the hard way. As an operator, I fell into the convenience script trap too many times to understand one thing,
Convenience script is always the least convenient.
How do you know the script won’t break your system? If that script is not working, how do you clean up your system? Everything can happen because we are using ARM. Endurance is a virtue. Let’s install Docker from the repository. One more thing is that you should read the change log of Kubernetes to figure out the validated docker versions. In my case, versions higher than 17.03.x are not validated yet while version 17.03.x has been removed from the Docker CE stable channel. I have to install Docker from source and apt-mark hold docker-ce to make sure I got the right version.
After installing Docker, you also need to turn off swap and change some boot options. Run the command in Alex Ellis’s guide, reboot your Raspberry Pis and come back before installing Kubernetes.
Finally, you are ready to install Kubernetes now. I don’t know if the latest version works on you because Kubernetes is still under heavy construction. I was not lucky enough to get the most recent version work on my cluster. I have to downgrade to v1.10.2. You can always go read/create issues if you have any questions.
curl -s https://packages.cloud.google.com/apt/doc/apt-key.gpg | sudo apt-key add -
echo "deb http://apt.kubernetes.io/ kubernetes-xenial main" | sudo tee /etc/apt/sources.list.d/kubernetes.list
sudo apt-get update -q
sudo apt-get install -qy kubelet=1.10.2-00 kubectl=1.10.2-00 kubeadm=1.10.2-00
I also apt-mark hold kubelet kubectl kubeadm after the installation. An arbitrary upgrade may easily break the whole cluster.
Now it’s time to initiate your master node. The reason that I use the second node (192.168.1.12) as the master node is that every time I try to initiate my first node, a Raspberry Pi 3 (not 3+) as the master, a kernel oops will occur – for some reasons I can’t even figure out why.
sudo kubeadm init --token-ttl=0 --apiserver-advertise-address=192.168.1.12 --pod-network-cidr=10.244.0.0/16
We run kubeadm init with the --pod-network-cidr=10.244.0.0/16 option because we will use flannel as a CNI network provider. Why not Weave Net? The same issue, ARM is not supported yet.
curl -sSL https://rawgit.com/coreos/flannel/v0.9.1/Documentation/kube-flannel.yml | sed "s/amd64/arm/g" | kubectl create -f -
Don’t forget to copy Kubernetes config to $HOME/.kube.
mkdir -p $HOME/.kube
sudo cp -i /etc/kubernetes/admin.conf $HOME/.kube/config
sudo chown $(id -u):$(id -g) $HOME/.kube/config
You will see the following command if you successfully initialize your master node. Go to other nodes and run it.
kubeadm join 192.168.1.12:6443 --token <TOKEN> --discovery-token-ca-cert-hash <HASH>
Be patient. Brew you a cup of coffee. Hopefully, you will see all you nodes are ready if you run kubectl get nodes on your master node.
NAME      STATUS    ROLES     AGE       VERSION
raspi-1   Ready     <none>    2d        v1.10.2
raspi-2   Ready     master    2d        v1.10.2
raspi-3   Ready     <none>    2d        v1.10.2
raspi-4   Ready     <none>    2d        v1.10.2
If some of them are still not ready in an hour, run kubectl get pods --all-namespaces and see which pod fails.
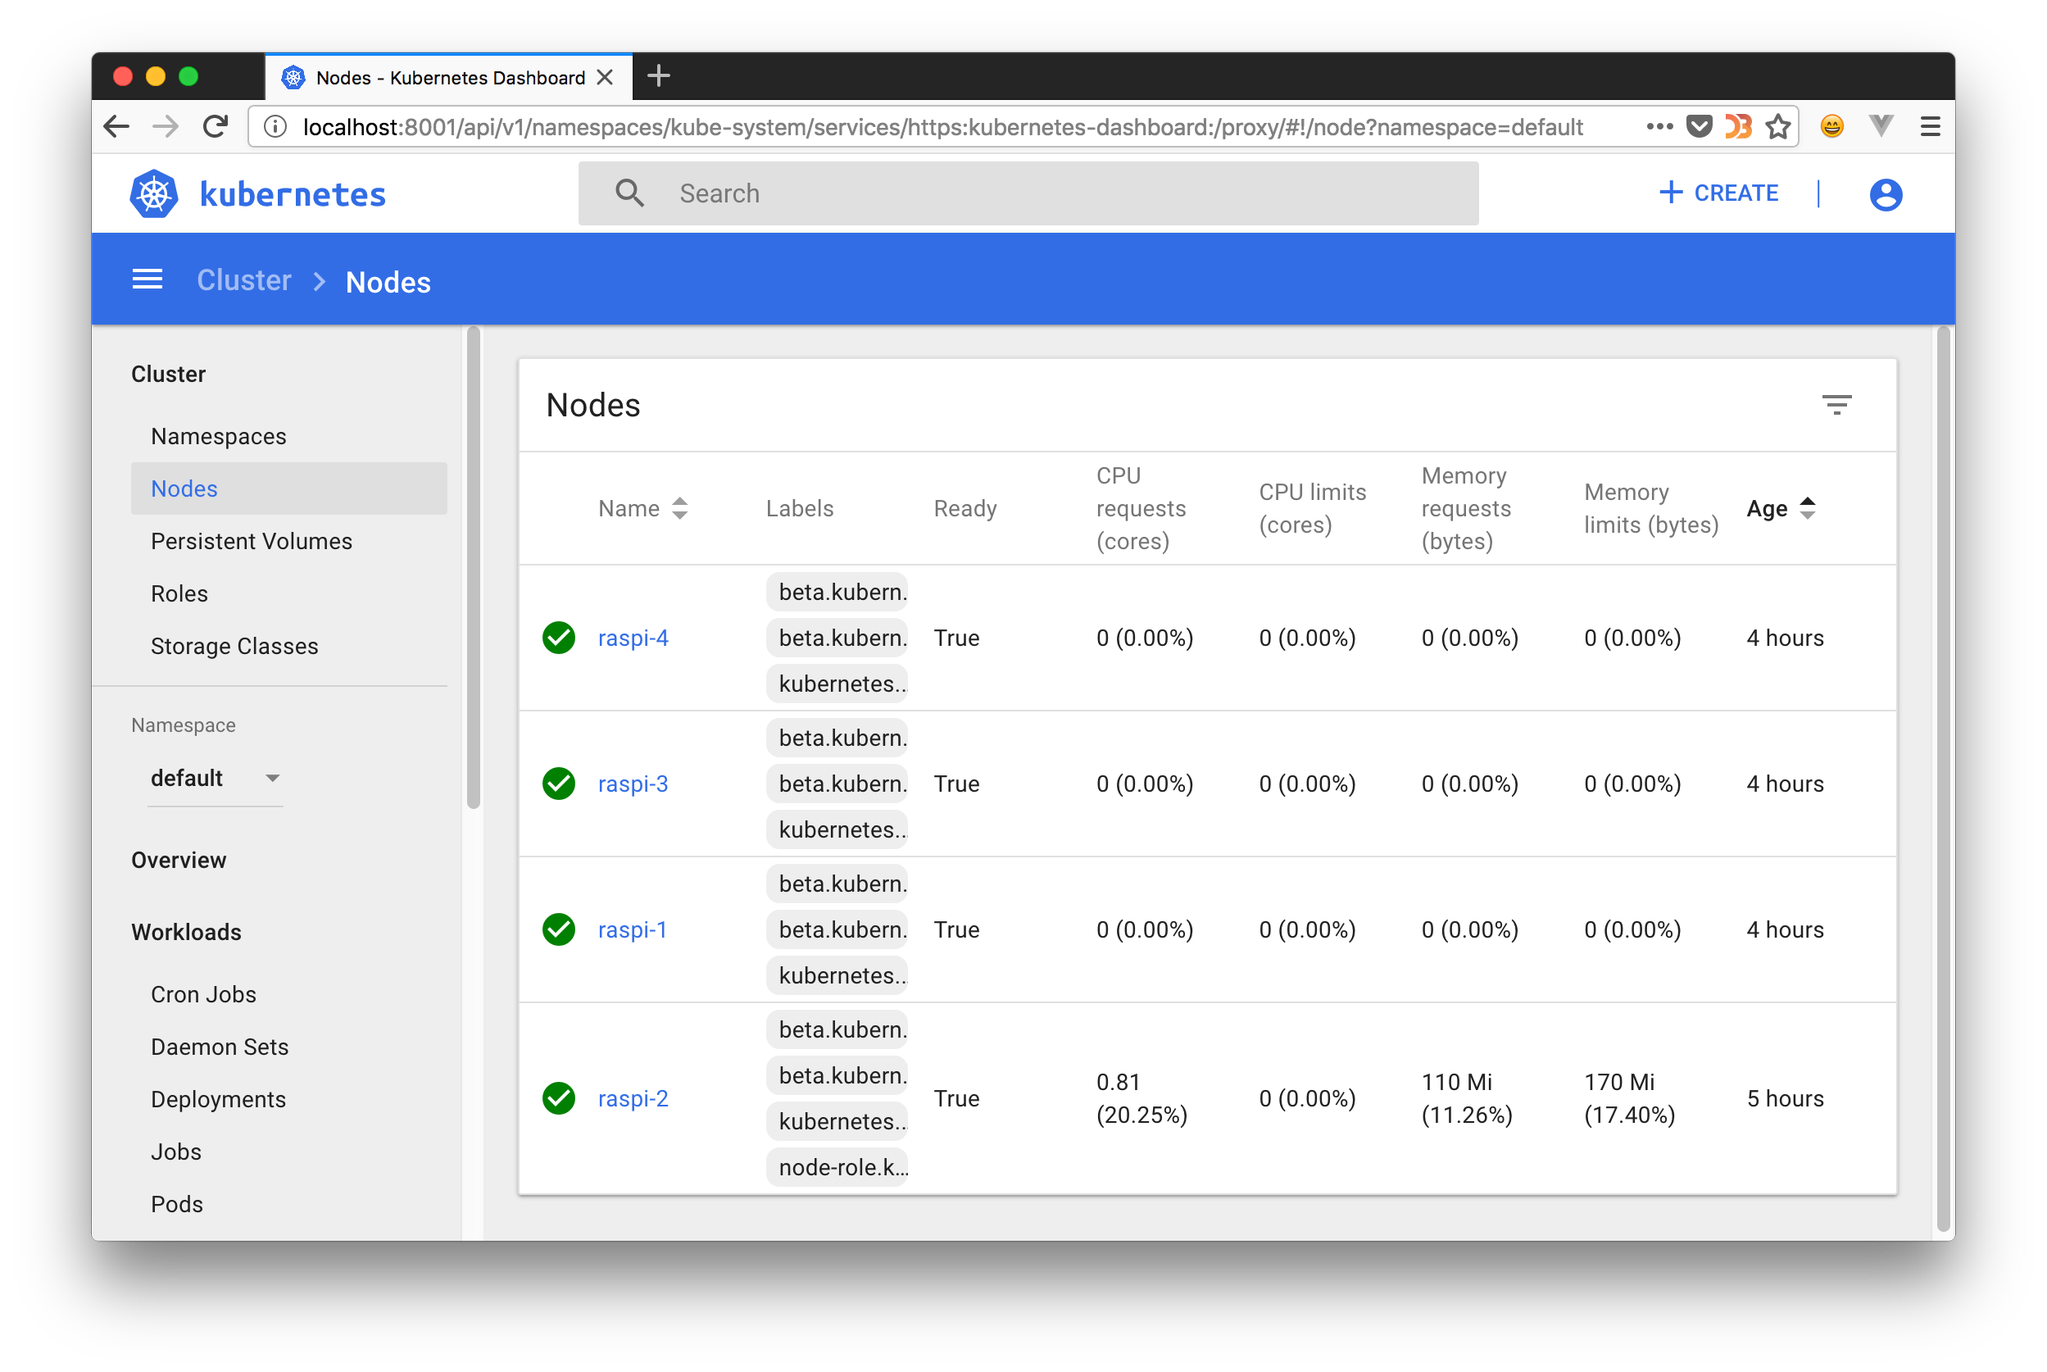
This post should have finished here. But it’s just a start for you as a Kubernetes novice. Want a dashboard for your Kubernetes cluster? Make sure you install the ARM version.
kubectl create -f https://raw.githubusercontent.com/kubernetes/dashboard/master/src/deploy/recommended/kubernetes-dashboard-arm.yaml
Create a sample user.
kubectl create serviceaccount dashboard -n default
kubectl create clusterrolebinding dashboard-admin -n default --clusterrole=cluster-admin --serviceaccount=default:dashboard
Make sure you also have kubectl installed and configured (copy the $HOME/.kube folder from your master node) on you local machine. Run kubectl proxy and go to
http://localhost:8001/api/v1/namespaces/kube-system/services/https:kubernetes-dashboard:/proxy/
Hopefully, you will see this.
You may also want to expose your services and use Træfik as an ingress controller for your Kubernetes cluster. For more information, please read Træfik documentation. An example is, you can label one of your nodes to use Træfik as a nginx controller and then expose your services with the IP of that node.
Containerization is NOT the solution to all infrastructure. Building and maintaining a Kubernetes based infrastructure that has the container as a first-class citizen needs the joint effort of both developers and operators. Kubernetes is not an elixir for the infrastructure I am maintaining simply because as for our users, stability is the first.
サービスの継続性とか、情報が無くならないとかいうことについて執着心がなさ過ぎる。
— Shigeya (@shigeyas) May 29, 2018
やっぱり、怒られたりないんじゃないのかな。